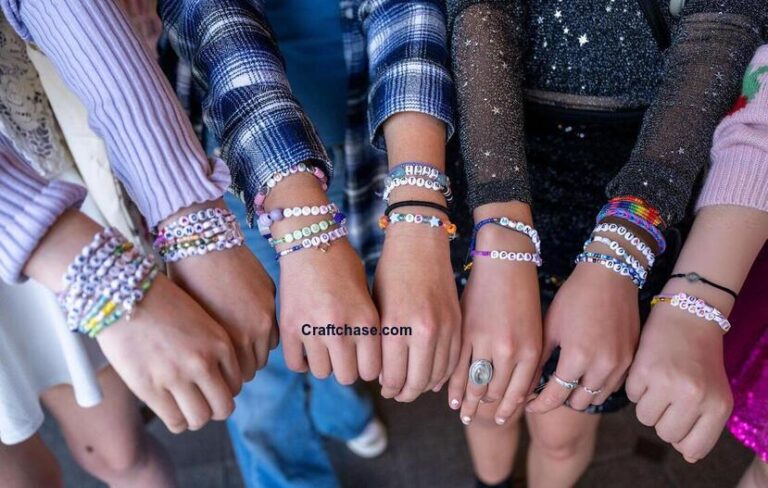
Calling all Swifties! Let’s get crafty and celebrate our love for Taylor Swift with some personalized bracelets. These bracelets are perfect for everyday wear, concert attire, or even as thoughtful gifts for fellow Swifties. Who knows, maybe you’ll love creating them so much, you’ll be inspired to turn your hobby into a full-blown business!
If that spark ignites, be sure to check out our guide How to Start a Craft Business in 10 Simple Steps.
The beauty of this project is its versatility. You can tailor your bracelet to represent your favorite Taylor Swift era, spell out lyrics that resonate with you, or simply create something cute and colorful. So, grab your crafting supplies and get ready to unleash your inner creative director!
Quick Navigation:
Materials needed to make Taylor Swift Bracelets
Before we dive in, gather these essential supplies to bring your Taylor Swift bracelet vision to life:
- Embroidery floss or beading cord: Choose a variety of colors to represent your favorite eras or create unique patterns.
- Scissors: To snip your floss or cord to the perfect length.
- Tape: To secure the floss while crafting.
- Clasp (optional): For easy on-and-off wear.
- Beads:
- Pony Beads: Small, colorful beads that come in a vast array of colors, perfect for creating vibrant patterns.
- Letter Beads: These are essential for spelling out lyrics or messages on your bracelet.
- Clay Beads or Spacer Beads (optional): Add a touch of elegance or separate colors with these decorative beads.
- Ruler: To measure your wrist and cut your floss to the right size.
Choosing Your Design:
There are three main ways to design your Taylor Swift bracelet:
- Era-Inspired: Select colors that represent your favorite Taylor Swift era. For example, use light pinks and blues for “Speak Now” or bold reds for “Red.”
- Lyric Love: This is where letter beads come in! Choose a meaningful lyric and use letter beads to spell it out on the center of your bracelet. You can even add a heart bead or a star bead for an extra touch.
- Simple & Sweet: Create a colorful pattern using embroidery floss or cord in your favorite colors. Add some clay beads or spacer beads for a little extra detail.
How to make Taylor Swift Bracelets / Ideas
Step 1: Measure and Cut
Cut a length of embroidery floss or cord approximately three times the size of your wrist. You can always trim the excess later.
Step 2: Secure the String
Tape one end of the floss to a flat surface like a table or book. This will keep it secure while you work on your design.
Step 4: Adding Beads
Basic Beading Technique: We’ll be using a simple beading technique throughout this project. Thread your chosen bead (pony bead or letter bead) onto the floss, then push it up against the knot at the taped end. Repeat this process, adding beads according to your design.
Step 5: Creating Your Design
For patterned bracelets: If you’re using multiple colors of pony beads to create a design, you can use a basic bead weaving technique like peyote stitch. There are many tutorials available online for different bead weaving stitches YouTube:
For lyric bracelets: Use letter beads to spell out your chosen lyric in the center of your bracelet. You can add pony beads or spacer beads before and after the letters for spacing.
Step 6: Finishing Touches
Once your bracelet reaches your desired length, tie a secure knot at the end. You can add a dab of clear nail polish or glue to the knot for extra security. Trim off any excess string.
Most secure knot: Here’s how to tie bracelets.
Step 7: Clasp Consideration
For easier wear, you can attach a clip-on clasp to each end of the bracelet using jewelry pliers (if you have them).
Extra Tips:
- Use a crochet needle to help thread the beads if you find it difficult with your fingers.
- Get creative with your design! You can incorporate charms, tassels, or even small photos of Taylor Swift.
- Make a bunch of bracelets in different styles and share them with your fellow Swifties!
Show Off Your Work!
We’d love to see your amazing Taylor Swift bracelet creations! Share a photo on social media and tag us @craftchasehub and use the hashtag #SwiftieBracelets to spread the love. You can also comment a link to your work below. We can’t wait to see your unique designs!
FAQ on Taylor Swift Bracelets
Can I substitute embroidery floss with another material? Yes, you can use other materials like yarn or leather cord, but keep in mind the thickness and how it will work with the size of your beads.
What if I don’t want to write any lyrics? No problem! The beauty of this project is its customization. You can create a patterned bracelet using various colored pony beads in a design you love. Think stripes, chevrons, or even friendship bracelet patterns!
Can I make the bracelet adjustable? Absolutely! Instead of tying the ends together permanently, you can use a sliding knot technique or add an adjustable clasp.
Here’s making adjustable sliding Knot:
Where can I find more inspiration for bracelet designs? There are many resources available online! Search for “beaded bracelet patterns” or “friendship bracelet patterns” on websites like Pinterest or YouTube. You can also look at online craft stores for project ideas.
How can I care for my bracelet? To keep your bracelet looking its best, avoid wearing it in water or while exercising. Store it in a cool, dry place when you’re not wearing it.
Conclusion: With a little creativity and these helpful tips, you’re well on your way to crafting the perfect Taylor Swift bracelet! So, grab your supplies, put on some Taylor Swift tunes, and get ready to express your love for your favorite artist in a unique and personal way!