Charizard, the fiery and powerful dragon-type Pokémon, has captivated hearts since its debut in the Kanto region. Its imposing stature, impressive wingspan, and ferocious flames have cemented its place as a fan favorite. But what if you could bring this majestic creature to life not just on screen, but on paper?
This guide will equip you with the tools and techniques to craft your very own Charizard masterpiece. We’ll delve into a step-by-step process, offering detailed instructions and helpful tips along the way. So, grab your pencils, unleash your inner artist, and get ready to ignite your creativity!
Quick Navigation:
Materials needed to draw Charizard
Before we embark on this fiery adventure, let’s gather the essentials:
- Pencil: A good quality pencil forms the foundation of your drawing. Opt for an HB or 2B lead for a balance between darkness and ease of erasing.
- Eraser: Mistakes are inevitable, and a good eraser ensures a clean canvas as you refine your artwork.
- Drawing Paper: Choose a smooth, heavyweight paper that can withstand multiple erasing sessions without tearing.
- Sharpener: Keep your pencil point sharp for precise lines and intricate details.
- Colored Pencils/Markers/Paints (Optional): Once your masterpiece is complete, unleash your creativity and bring Charizard to life with vibrant colors!
Video Tutorial to Draw a Charizard
For a visual demonstration of the drawing process, check out this helpful video guide:
How to Draw Charizard in 6 simple steps
Step 1: Embracing the Canvas – Composition and Negative Space
Before diving into Charizard’s anatomy, let’s explore the concept of composition and negative space. Composition refers to the arrangement of elements within your drawing. In simpler terms, it’s how your Charizard will be positioned on the page. Negative space is the empty area surrounding your subject.
Think about how you want Charizard to interact with the space. Will it be a full-body illustration dominating the page, or a more dynamic pose leaving room for a fiery background? Using negative space effectively creates a sense of balance and visual interest, allowing Charizard to truly shine.
Step 2: Building the Skeleton – Sketching Charizard’s Body
Now, let’s break down Charizard’s mighty form into basic shapes:
- Head: Start with a small circle on the upper left portion of your page. This will be the foundation for Charizard’s head.
- Spine: Imagine the spine as a curving line extending downward from the head towards the lower portion of the body.
- Torso: Sketch two ovals, one larger than the other, stacked on the bottom of the spine. The larger oval represents the lower torso, while the smaller one defines the upper torso.
- Neck: Thicken the left side of the neck with a curved line connecting the body to the back of the head. Repeat on the right side to create a symmetrical neck.
- Shoulders: Add two small half circles on the upper torso to represent the shoulders.
- Arms: Draw lines extending from the shoulders, depicting the arms with elbows and hands at the ends.
- Legs: Sketch lines extending from the lower torso, incorporating knees and feet for the legs. Remember to curve the legs to position the feet behind the thighs.
- Tail: From the right side of the body, draw a curved line that extends across the front and thickens towards the tip. This will be Charizard’s powerful tail.
- Wings: Sketch two large wing shapes behind the body. Imagine the wings containing bones and points for structure.
Step 3: Adding Details – Refining the Sketch
With the basic shapes in place, it’s time to refine your sketch and add details that bring Charizard to life:
- Head: Refine the circle into Charizard’s head, incorporating the muzzle, eyes, brows, and horns. Reference pictures can be helpful in accurately capturing these features.
- Arms and Hands: Add details to the arms, hands, fingers, and claws. Remember, Charizard boasts sharp claws that enhance its ferocious appearance.
- Body Patch: Include the distinctive patch on Charizard’s chest and continue it along the tail for a cohesive look.
Step 4: Shading and Highlighting – Bringing Charizard to Life
Now comes the magic! Shading and highlighting add depth and dimension to your drawing, transforming Charizard from a flat sketch into a dynamic creature. The video tutorial provides a detailed demonstration of shading techniques. Here are some general tips:
- Light Touch: Utilize a light touch with your pencil to create subtle variations in tone. Think of it as a conversation between light and shadow.
- Layering: Build up tones gradually, adding darker shades in areas where shadows fall. Imagine light hitting Charizard from a specific direction, and use darker tones to depict areas where the light is blocked.
- Blending: Use a cotton swab or your finger to gently blend your shading, creating a smooth transition between light and dark areas. A well-blended drawing appears more natural and polished.
Step 5: Cleaning Up and Final Touches – The Finishing Flourish
With shading complete, it’s time to polish your masterpiece:
- Eraser Magic: Employ your eraser to carefully remove any unwanted pencil marks or stray lines.
- Refine Details: Take a moment to refine any details that might not have received enough attention during the previous steps.
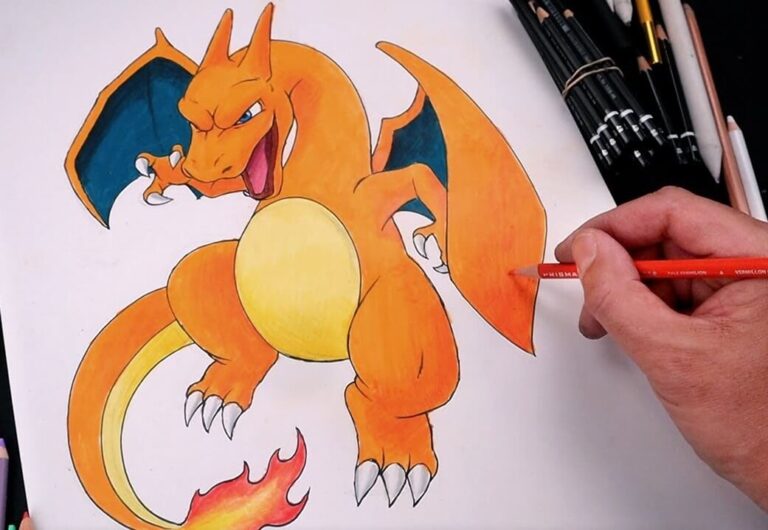
Step 6: Unleashing Your Creativity – Color and Background (Optional)
This step is where you can truly unleash your creativity! The provided materials list offered colored pencils, markers, or paints as optional additions. If you choose to add color, here are some suggestions:
- Reference Images: Use Pokémon illustrations or reference pictures as a guide for Charizard’s color scheme.
- Color Choice: Experiment with different colors to create a unique look. You can stick to the traditional orange and blue, or explore alternative palettes.
- Background Scene: Consider adding a background scene to enhance the overall composition. Perhaps Charizard is soaring through a fiery landscape, or maybe it’s perched atop a rocky mountain.
Beyond the Basics: Tips and Tricks for Aspiring Artists
Your Charizard masterpiece is complete! But the journey of artistic exploration doesn’t end here. Here are some additional tips to help you hone your drawing skills:
- Practice Makes Progress: The more you draw, the more comfortable and confident you’ll become. Don’t be afraid to experiment with different poses and techniques.
- Embrace References: Utilize reference images to study anatomy, poses, and shading techniques.
- Observe the World: Train your eye to observe the world around you. Notice how light interacts with objects, creating shadows and highlights. This awareness can translate into your drawings.
- Seek Inspiration: Find artists whose work resonates with you and study their techniques.
- Have Fun!: Above all, drawing should be an enjoyable experience. Don’t get discouraged by mistakes – they’re simply stepping stones on your artistic journey.
What is Charizard’s Role in the Pokemon Anime?
Charizard holds a significant place in the Pokemon anime, particularly for fans who followed the journey from the beginning. Here’s a breakdown of its multifaceted role:
- Ash’s Powerful Partner: One of Ash Ketchum’s most recognizable companions, Charizard starts as a stubborn Charmander and evolves throughout the series. Their bond, initially fraught with disobedience, matures into a formidable partnership.
- Symbol of Growth and Overcoming Challenges: Charizard’s journey reflects Ash’s growth as a trainer. Their initial struggles highlight the importance of trust and understanding between trainer and Pokemon. Overcoming these challenges strengthens both Ash and Charizard.
- A Fan Favorite: Charizard’s fiery personality, impressive strength, and captivating design have secured its place as a beloved character among fans. Its battles are often intense and memorable, solidifying its position as a formidable force in the anime.
- Recurring Appearances: Charizard isn’t confined to Ash’s team forever. It makes appearances throughout the series, reminding viewers of its impact and showcasing its continued growth as a powerful Pokemon.
Conclusion: Unleashing Your Inner Charizard
Through this step-by-step guide, you’ve acquired the skills to draw your very own Charizard masterpiece. Remember, artistic expression is a journey, not a destination. Enjoy the process, embrace experimentation, and don’t be afraid to unleash your inner artist. With dedication and passion, you’ll be drawing awe-inspiring creatures like Charizard in no time! So, grab your pencils, let creativity flow, and embark on your own artistic adventure!